Why Microsoft Power BI?
Microsoft’s Power BI is an interactive data visualization tool that can be leveraged to organize and visualize a company’s KPIs. Business Intelligence (BI) tools are a dime a dozen in today’s marketplace, but Power BI is made for integration with Microsoft Dynamics NAV, is a part of the Office 365 suite and is readily available with online access. Close integration with Dynamics NAV brings added benefits to Power BI, like the ability to embed into Dynamics NAV the same reports as in Power BI while still navigating within Dynamics NAV. Plus, there is the option to use the same username and password for Dynamics NAV, Power BI and other applications using the single Microsoft platform (also known as Single Sign On [SSO]). Beyond these added perks, Power BI offers many other advantages and integrations. Find out more on the Power BI website. It will show you how to easily set up the Dynamics NAV and Power BI integration without using Microsoft Dynamics NAV content pack for Power BI.Power BI with Microsoft Dynamics NAV
We have been able to successfully configure Power BI to embed reports in your Dynamics NAV instance, through integrating Dynamics NAV data into Power BI. For Connecting the Power BI with Microsoft Dynamics NAV we have to follow the below steps- Register An App In Azure Active Directory.
- Set up Azure Active Directory in NAV.
Register An App In Azure Active Directory
I would like to share the steps to register an app in the Azure Active Directory.Purpose of app registration
- It is used to integrate the application and service with Azure AD.
- Using Azure App, we can generate the token to authenticate the application.
- If we want to use the Azure AD capabilities, we must register the app.
- After we register the app, we can get the “Client ID, Secret key”.
Steps to register the new application in Azure AD
Follow the below-listed steps to register the application. Step 1Log into the Azure portal using your Azure account.
URL – https://portal.azure.com/
Step 2
Select Azure Active Directory from the left navigation.

SelectAD
Step 3
On the “Default directory” page, select the “App registrations” from the left panel, as shown below.
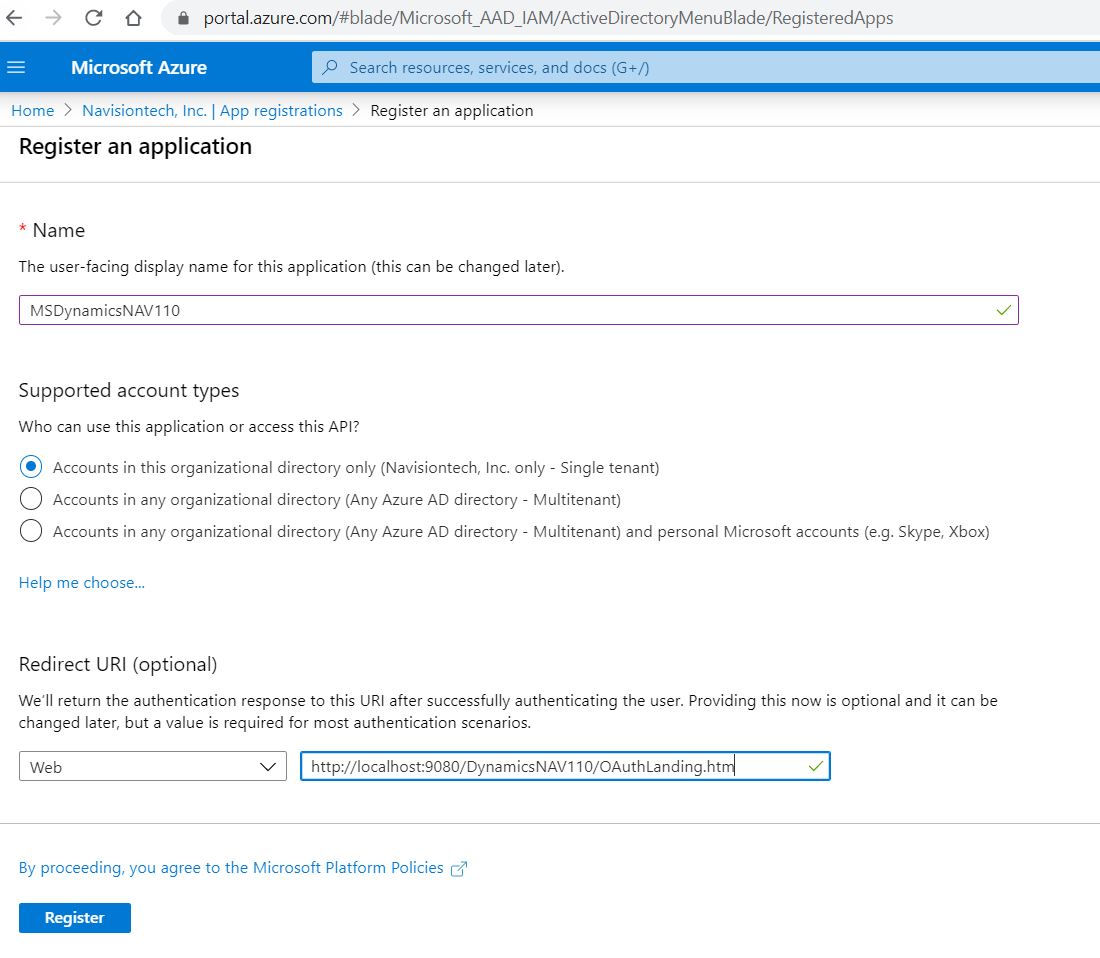
From App Registration pane, click NewApplication Registration option.
AppReg
Step 5
On the “Create” pane, type in the following information and then click the “Create” button.
| Field | Description | Sample |
| Name | Name for the new application. Type in the desired application name. | MSDynamicsNAV110 |
| Account type | Leave as Web | Web |
| Redirect URL | Redirect URL. | http://localhost:9080/DynamicsNAV110/OAuthLanding.htm |
Step 6
Once the application is created, edit the manifest file and change the value of oauth2AllowImplicitFlow parameter to true.
| Before |  |
| After |  |
Save the changes first and then click X to close the pane.
Step 8
 Step 9
Step 10
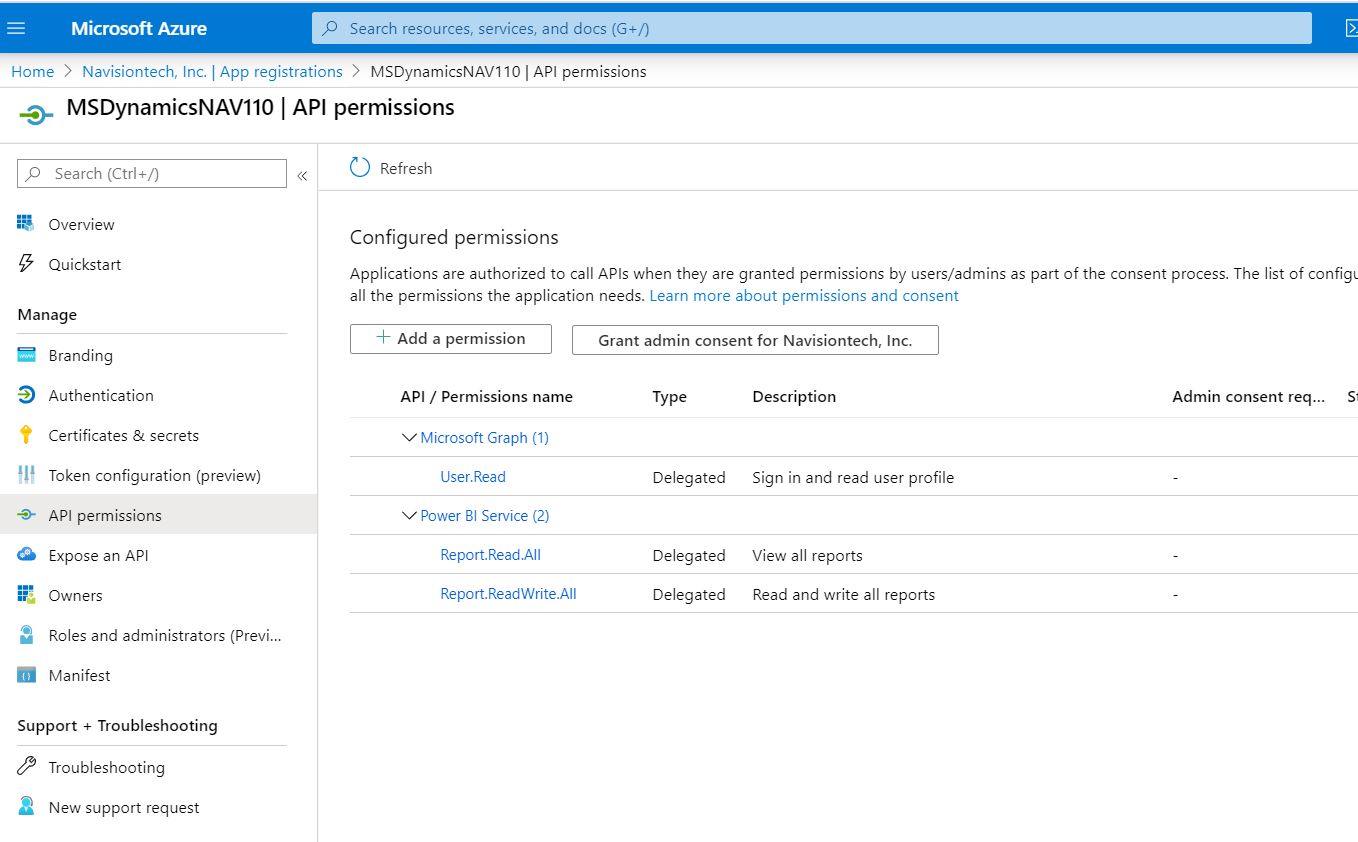
Then, we need to add the permissions.

APPPermission
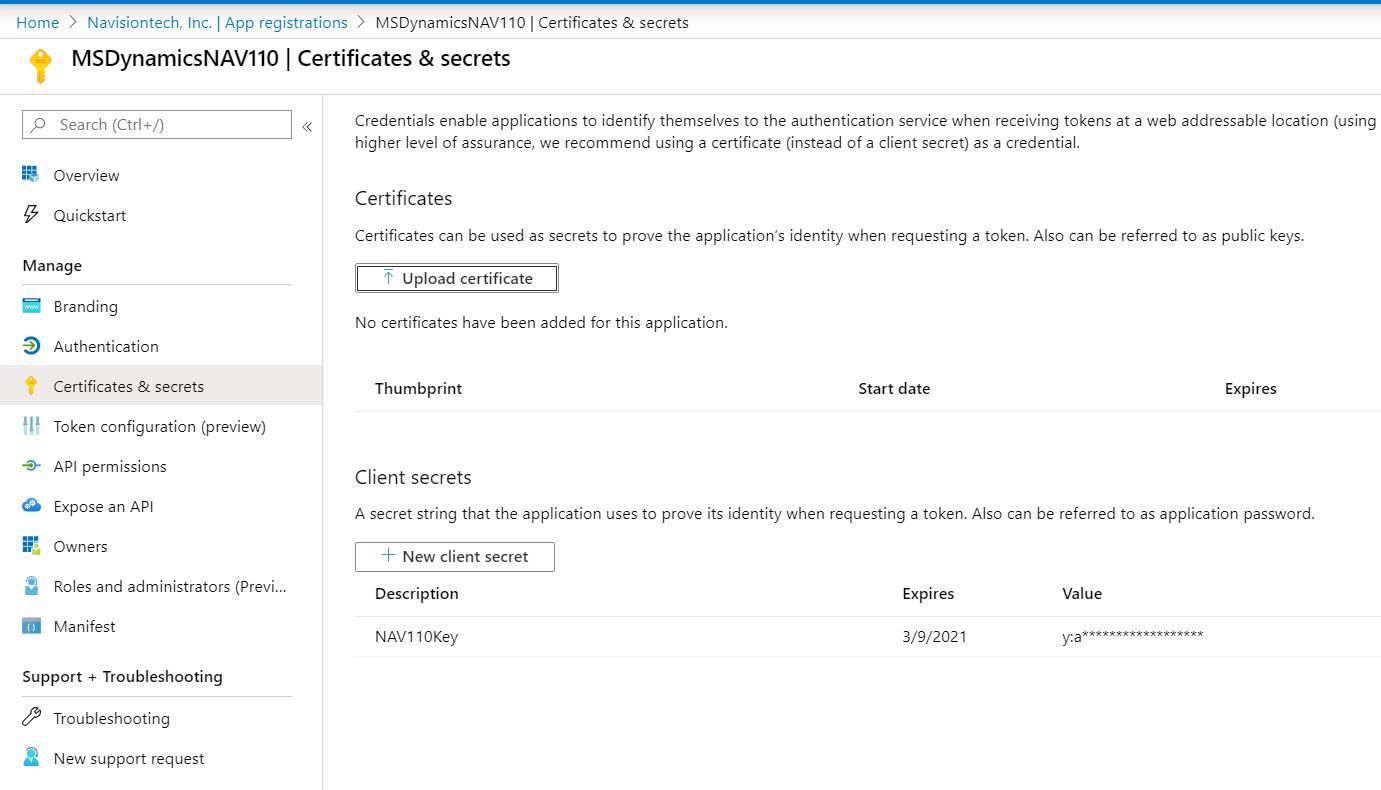
From Certificates & Secrets pane, type in the following information and then click the “Save” button.

Key
| Field | Description | Example |
| Description | Name for the key. Type in a descriptive name. | Secret Key |
| Expires On | Select Never expire option. | Never expire |
| Value | You will get the key when you click on the save |
From the Keys pane, copy the encoded key value. This key value cannot be retrieved after leaving this pane. This encoded key value is the Client Secret Key that will be a part of the authentication credential.
Step 11
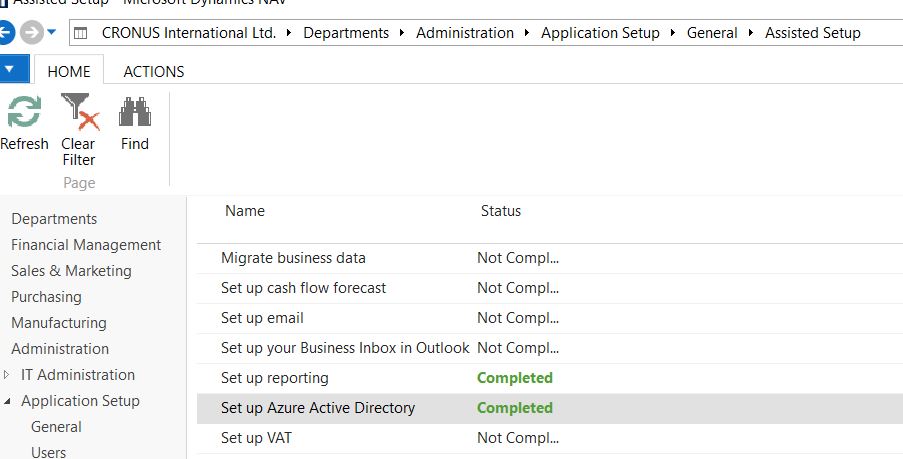
We have to copy the Application ID value and Key and do the setups in NAV as below.
go to the path
CRONUS International Ltd./Departments/Administration/Application Setup/General/Assisted Setup
AssistSetup
Double Click on Setup Azure Active Directory –> it will show the below steps
Set up Azure Active Directory in NAV
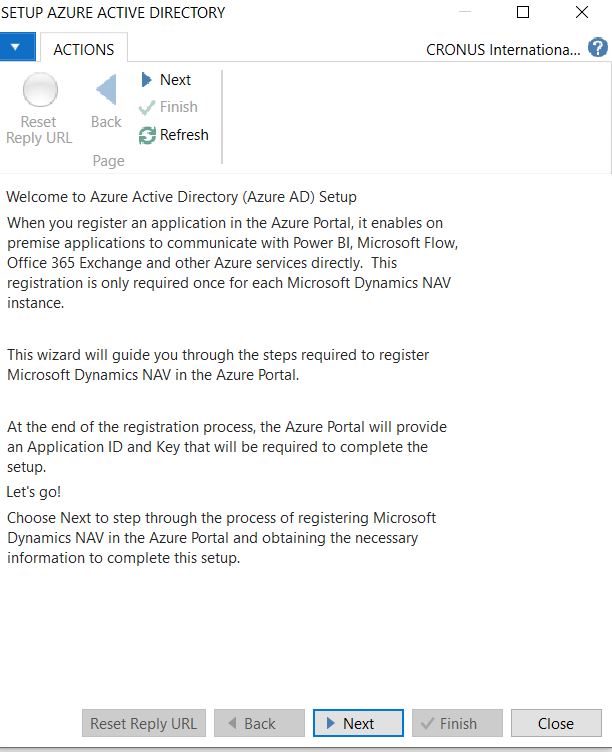
AzureActive
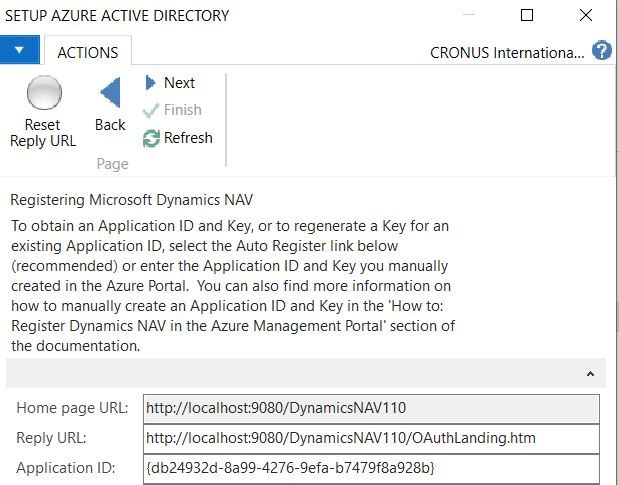
SetupAzure
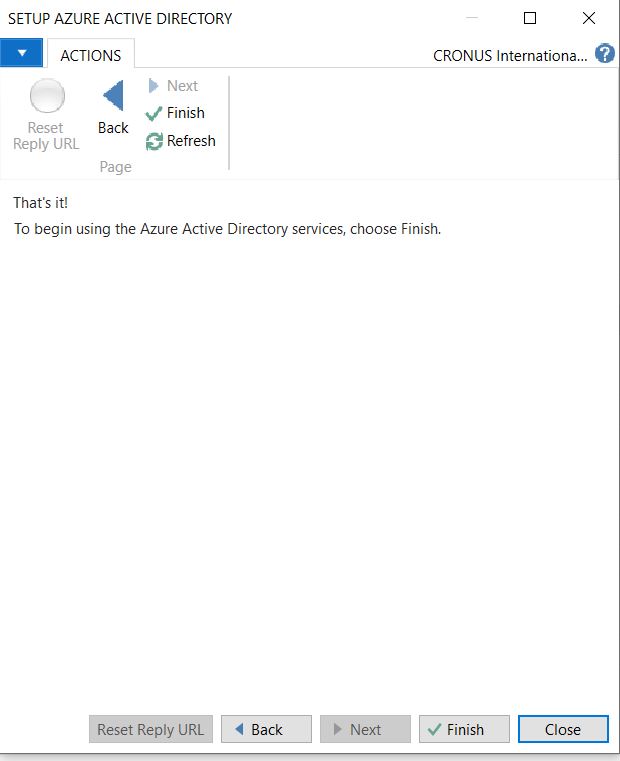
ActiveFinish
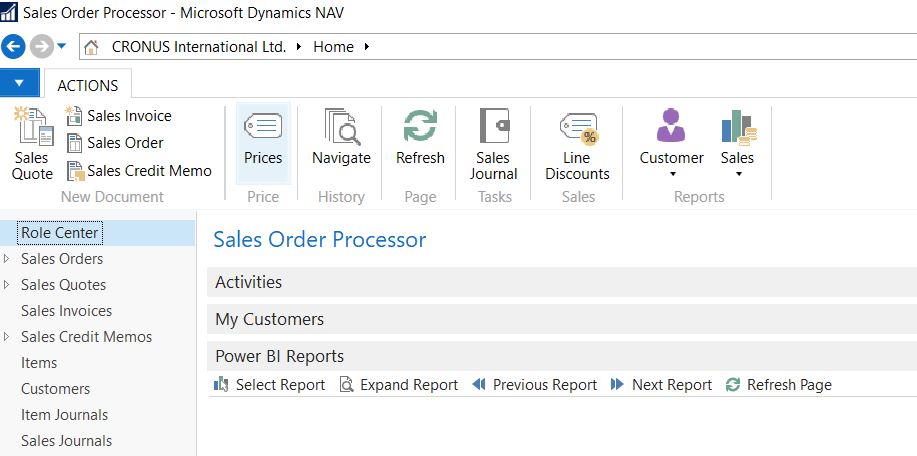
SelectReport
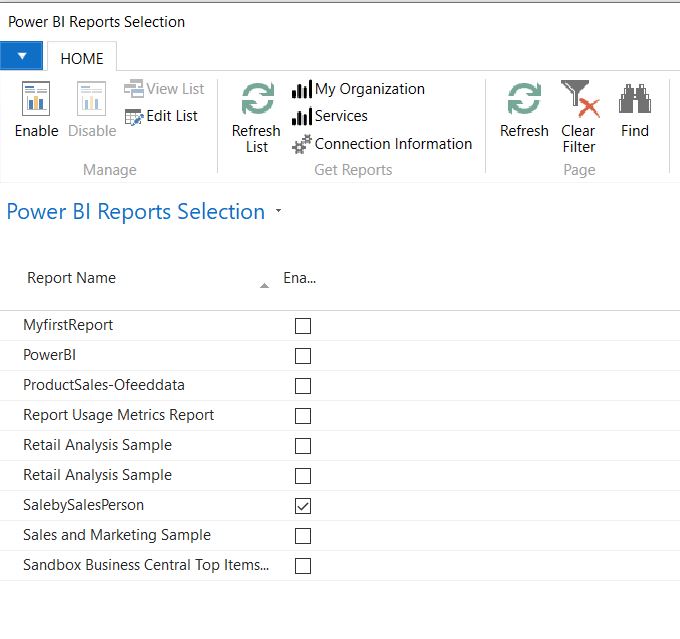
PowerBIReport
Tech Support from Navisiontech… On-Demand and On Point
Try Navisiontech Support today! We offer 2 FREE hours of support for nearly ALL versions of Dynamics NAV, from version 3 to Business Central. Our support team is US based and will provide support not only for your ERP system, but also for SQL Server, EDI, supply chain management tools, and even code-level support.

Leave A Comment